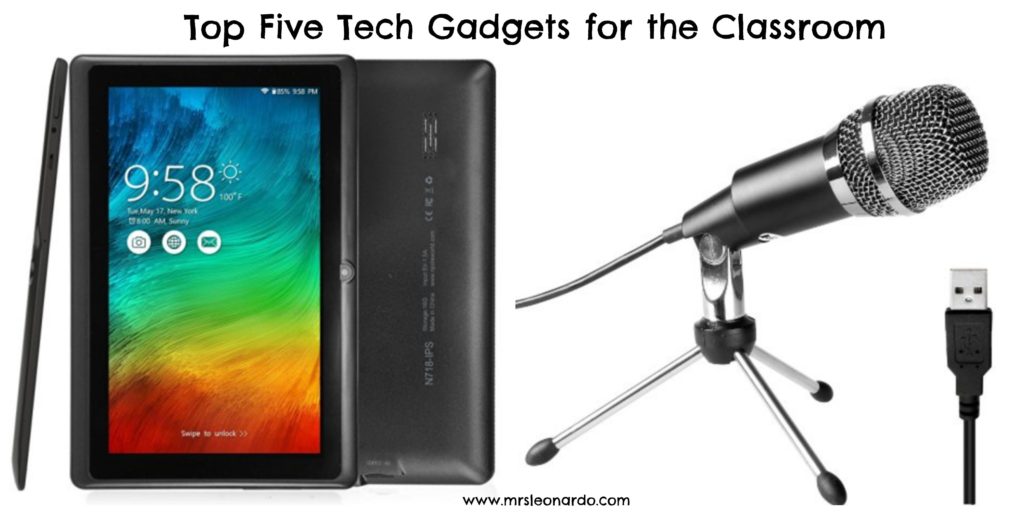
Top Five Tech Gadgets for the Classroom

Top Five Tech Gadget for the Classroom

Please keep in mind that I am using some affiliate links, and I earn a few cents from these links. This money is funneled right back into my classroom. Thank you for supporting my students!

I presented at the Silicon Valley Computer Using Educators Teach Through Technology professional development today, so if you’re here by way of my “Best Tech Practices for Long Term English Language Learners” presentation…welcome!

The resources for my presentation can be found here. I talked about all of the ways I attempt to make sure my students are always speaking, listening, reading, and writing in the classroom. While preparing for today’s presentation, I realized that it would be good for me to share some of the gadgets I use in my classroom. I’m sharing my top five tech gadgets for my classroom. Let’s get started!

  1. USB Microphones, $22 each

These microphones are a fairly recent purchase, and I’m so glad I decided to buy them. The mics are great for

  • Chromebooks, laptops, and other computers
  • students to record audio (discussion questions, group talking, think alouds)
  • Vocaroo, screencasts, and any other audio recording site

2. Lapel Microphones, $6.50 for Three

I purchased these lapel mics nearly two years ago for my students to record screencasts and lessons they created using Explain Everything. See students’ work here. Lapel mics can be used with and for

3.  Android Tablet$54.99

This is another fairly new purchase. A parent and I are working with groups of girls to create apps for Technovation’s coding challenge. The girls use MIT’s App Inventor, and they need a way to test their apps. We received a grant from Philanthropic Ventures Foundation to purchase the devices, and I ended up purchasing two more for my classroom. Full disclosure: if you’re used to an iPad, it’ll take some time to get used to the tablet. But, hey! At $55 a pop, these little things aren’t too shabby. I’ve found them to be great for:

  • ScratchJr.
  • testing MIT App Inventor apps.
  • reading (ereaders/reading apps).
  • reading, writing, speaking, and listening centers for two to three students.

Click through to see the final two items! Continue reading

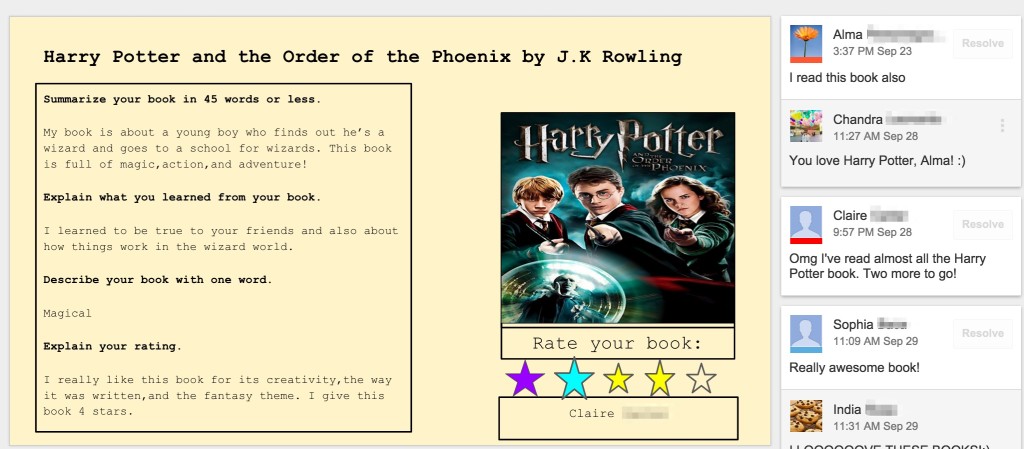
Use Google Slides for Classroom Book Talks

Google Slides Book Talk

Earlier in the school year I was trying to figure out a way to have my students talk about the books they were reading without having to crank out a hum-drum book report every month.

I decided to use Google Slides. Students were able to provide a brief synopsis about the book on a slide, and then they could read classmates’ slides and leave comments. I was floored by how enthusiastic my students were about their Book Talks! I had students asking if they could talk about more than one book, and many of my students continue to use the Book Talk slides to find new books to read.

Here is a YouTube video I created for my students to explain how to fill out their slides:

Book Talk

Tips, Tricks, and Ideas:

  1. Have students claim their slides–in waves: I made the mistake of saying, “Okay, everyone! Claim your slide!” Uh, no. Not a good idea! There were multiple students typing on slides, and it was kind of a train wreck. When I presented the slides to my 3rd, 5th, and 6th periods, I had students select their slides in groups of four.
  2. When leaving comments, use the + to tag people:  The + will allow students to add peers’ names to the comments and this will alert the added individual by email that they have a new comment to read.
  3. Allow students to insert and make their own videos: Students can insert videos from YouTube (ex: trailers for books made into movies), or insert videos of them talking about the book.
  4. Students can create collages using Google Draw: My students really love Google Draw, and we’ve used Draw to create collages. Students can create collages about their books (a couple of images, quotes, thematic topics/thematic statement) and insert them onto their slides.

How to Get Started:

  1. Create a new Google Slides project and title it.
  2. You can set it up like I did (see the video), or you can just have one slide with directions and students can add their own slides. If you opt to do the latter,  them trick number one (above) won’t be necessary.
  3. Share the link  to the slide deck with your students via email or Google Classroom.

Happy Book Talking!

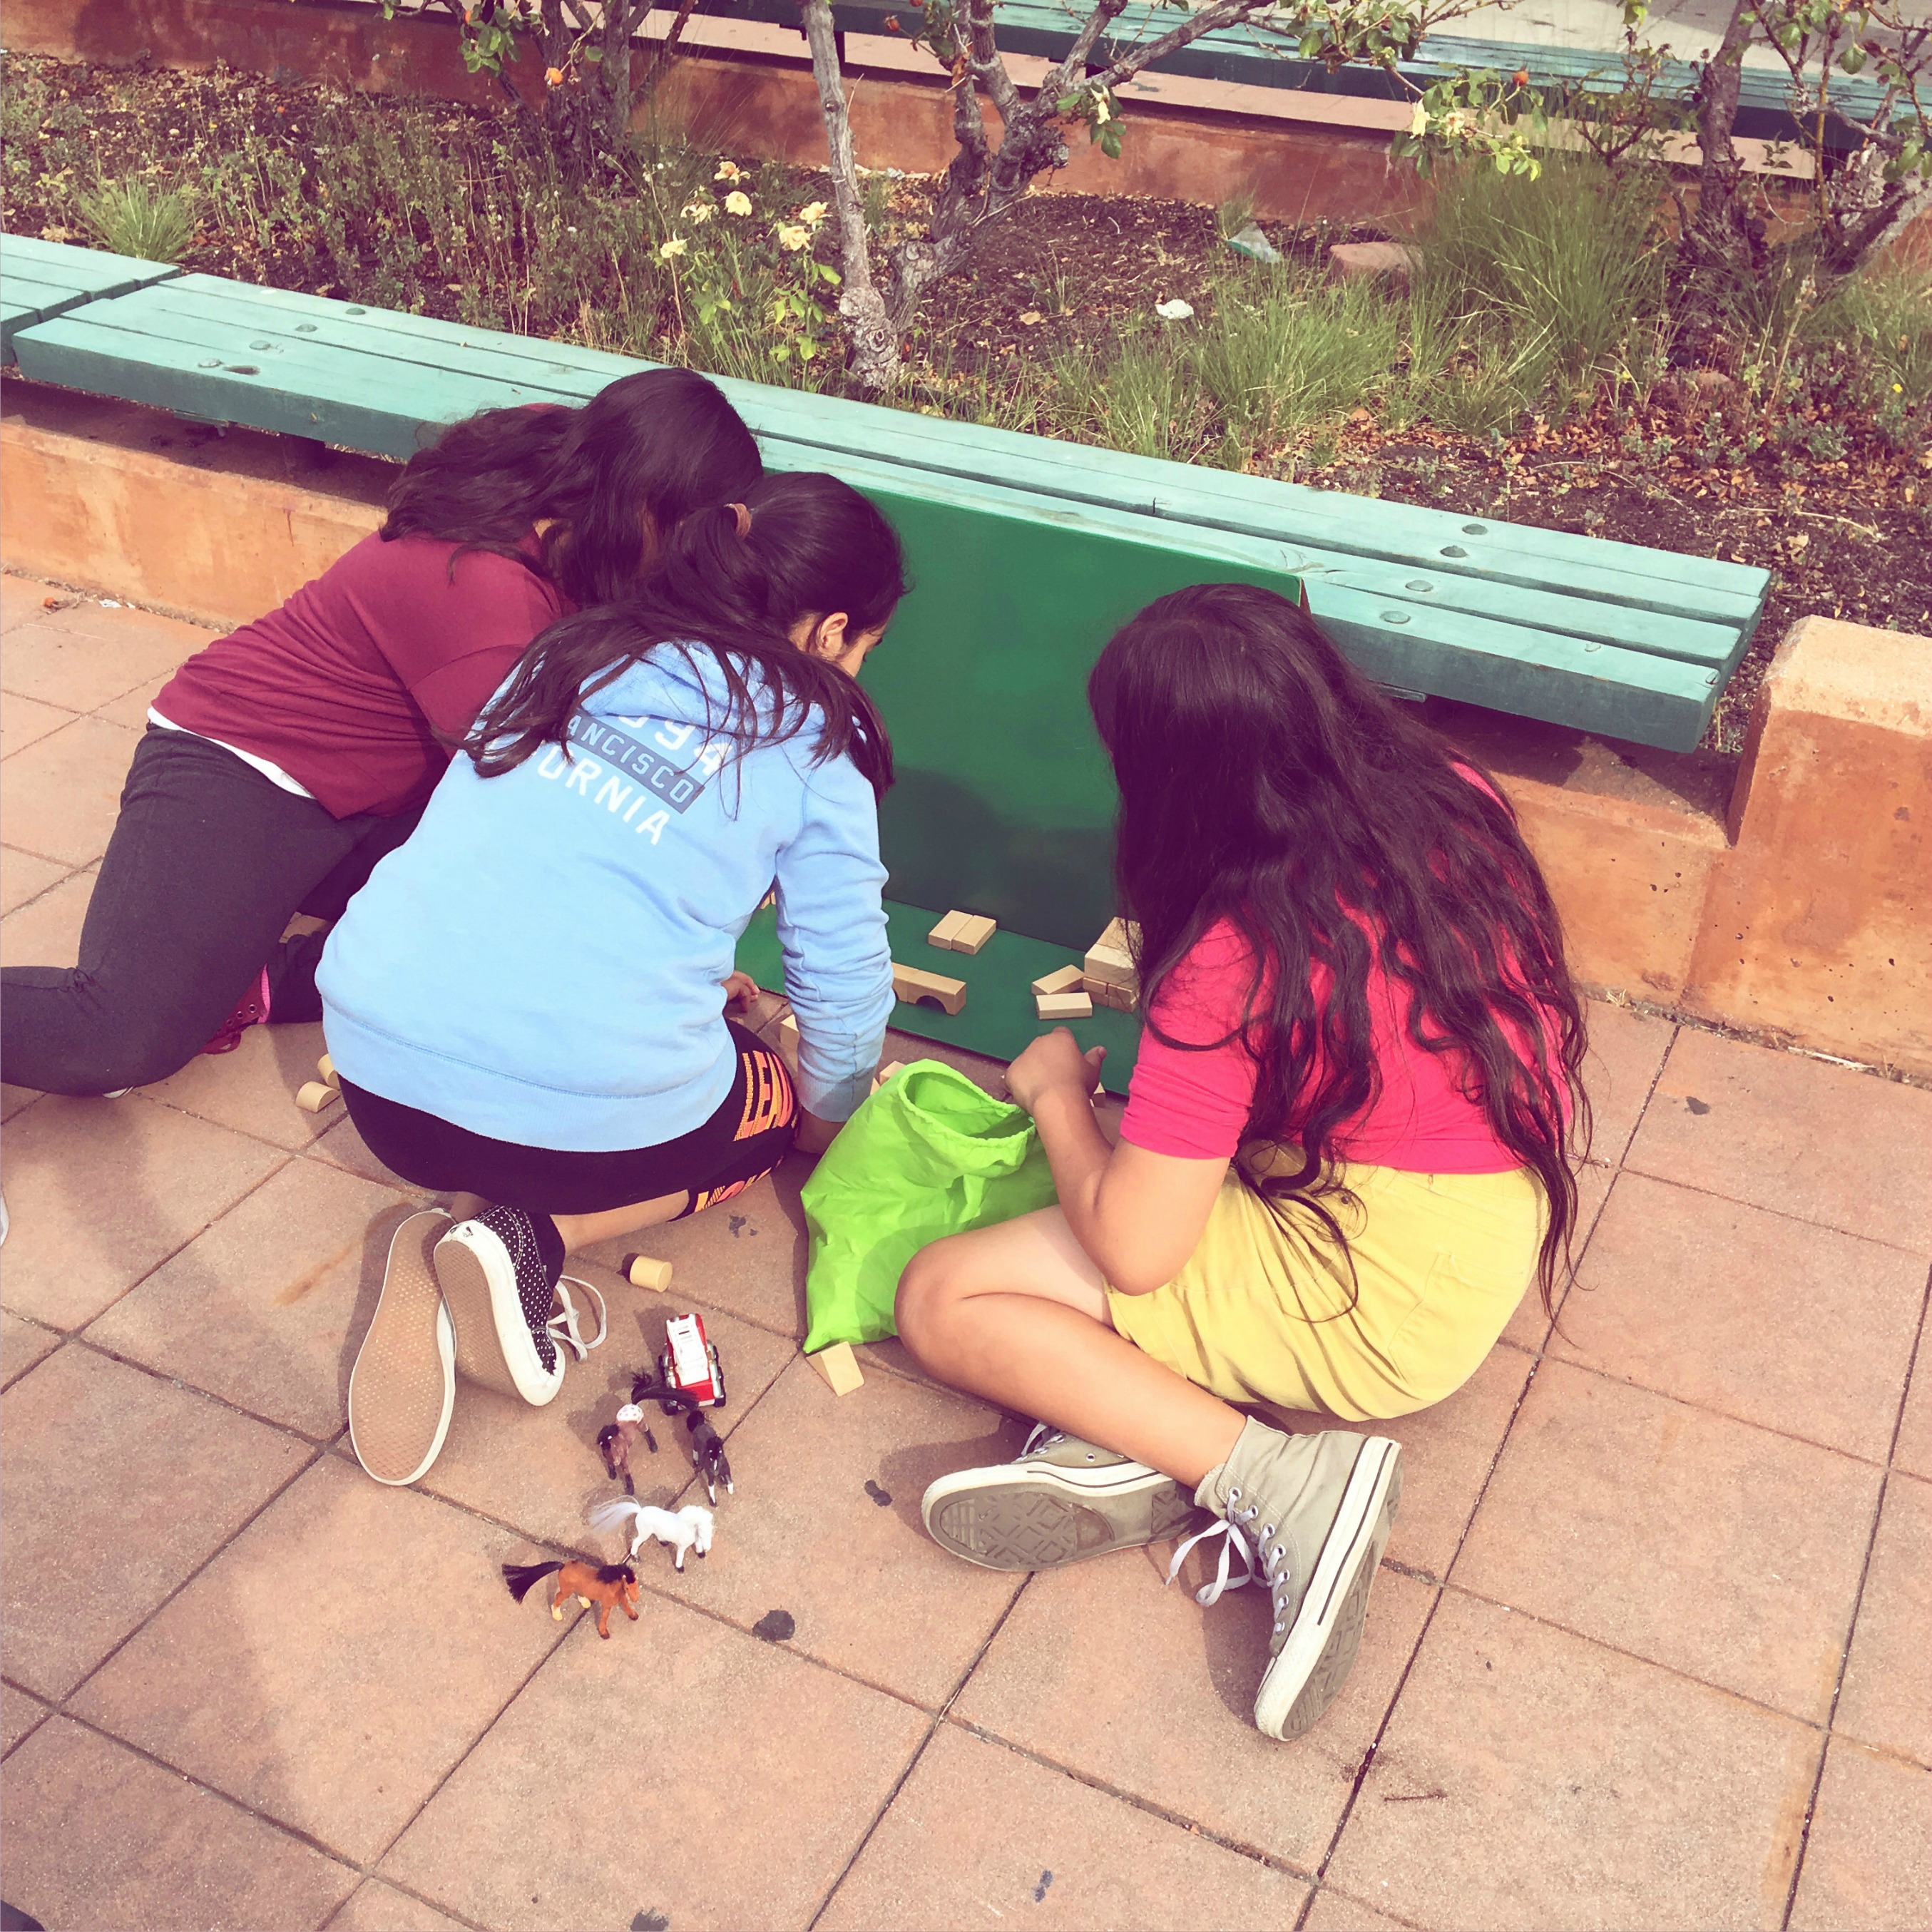
Toy Tales: A Green Screen Project

GreenScreen3

Way back in late September and early October, my students got their first experience with DoInk’s Green Screen app. I mentioned here that the kids read Jim Murphy’s informational text, “The Great Fire”, and talked about a project they were going to complete, but I never posted an update about the project!

The Task: After reading Jim Murphy’s text, students had to use toys and DoInk’s Green Screen App to create a video summary of the text.

The Technology:

  1. iPads: students used the DoInk Green Screen, iMovie, Explain Everything, Google Classroom, and Google Drive apps
  2. Chromebooks: students used the Chromebooks to access Google Classroom for their assignments and to write their script. They worked on their script with their group, and Google Docs allowed them to work on the script simultaneously

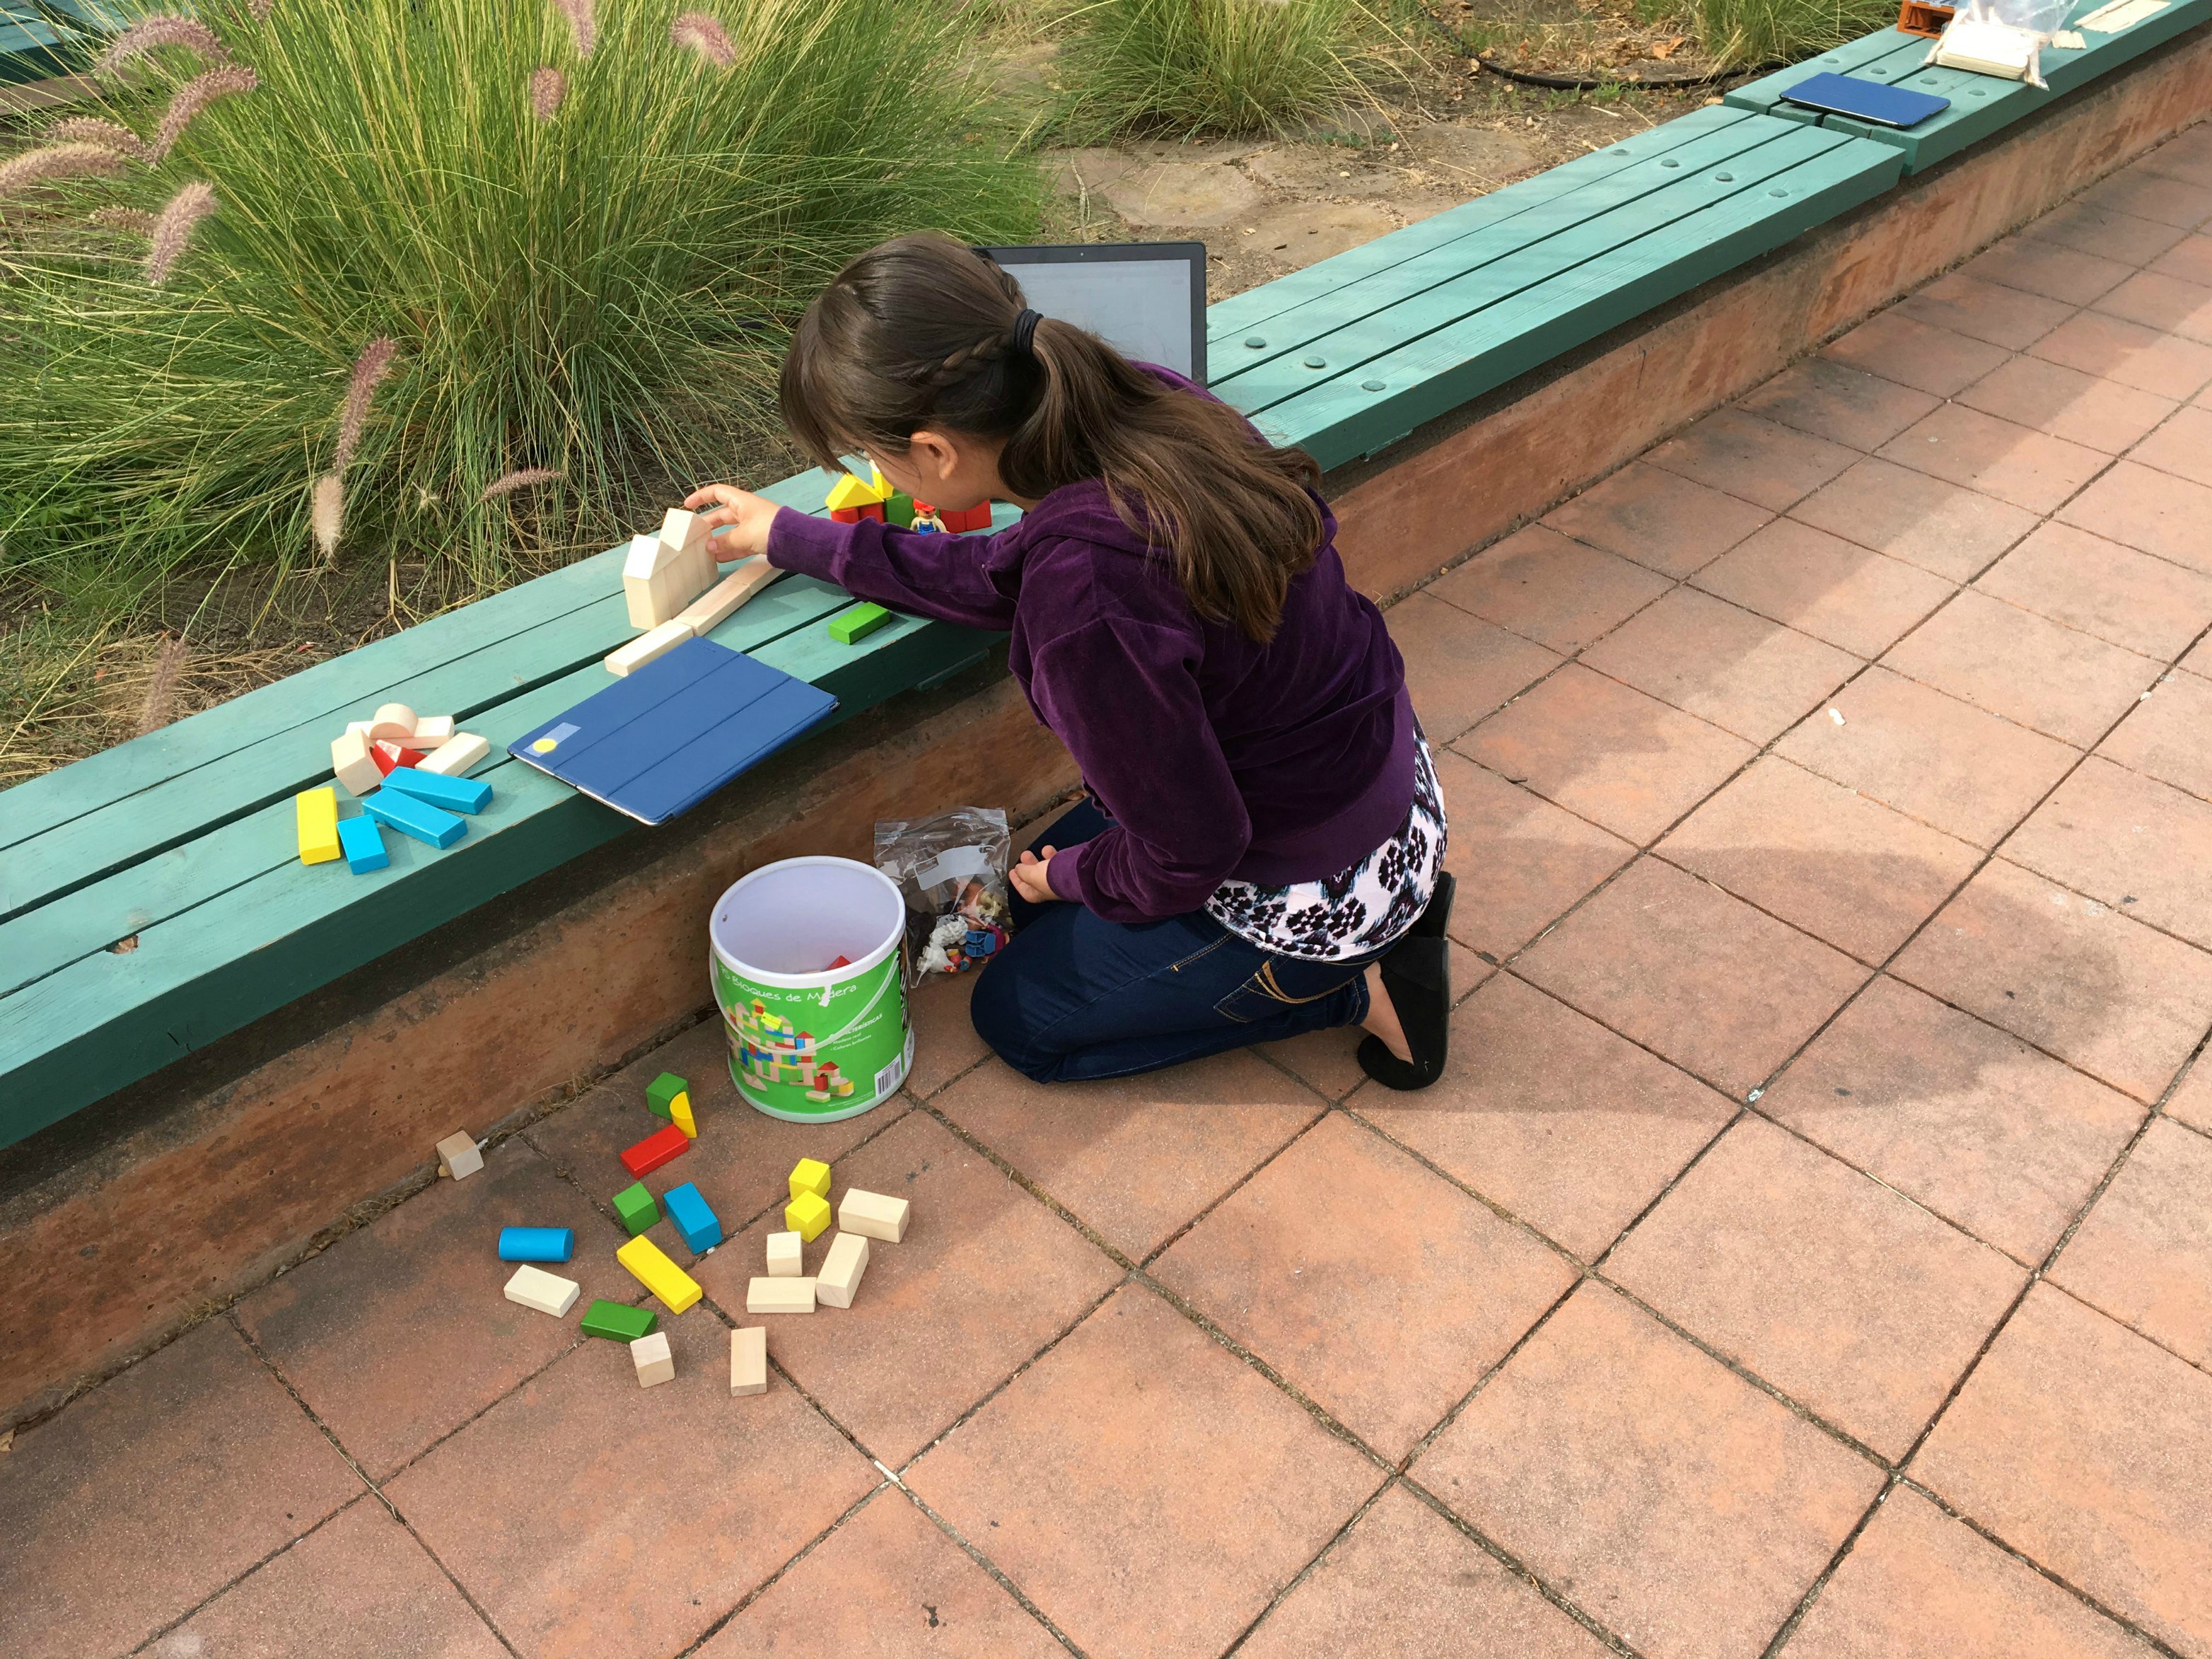
GreenScreen4

The Materials:

  1. Through DonorsChoose, I was able to secure funding to purchase this chroma key, or green screen, backdrop and stand.
  2. I purchased about 15 tri-fold Elmer’s cardboard project display boards for $1 each at Dollar Tree, and my husband and I spent about two to three hours on a Saturday spray painting the boards various colors. The DoInk Green Screen app let’s students film on any color background.
  3. I also found green folders, construction paper, and wrapping paper at Dollar Tree. I was also able to purchase several green muslin backgrounds on Amazon. through DonorsChoose.
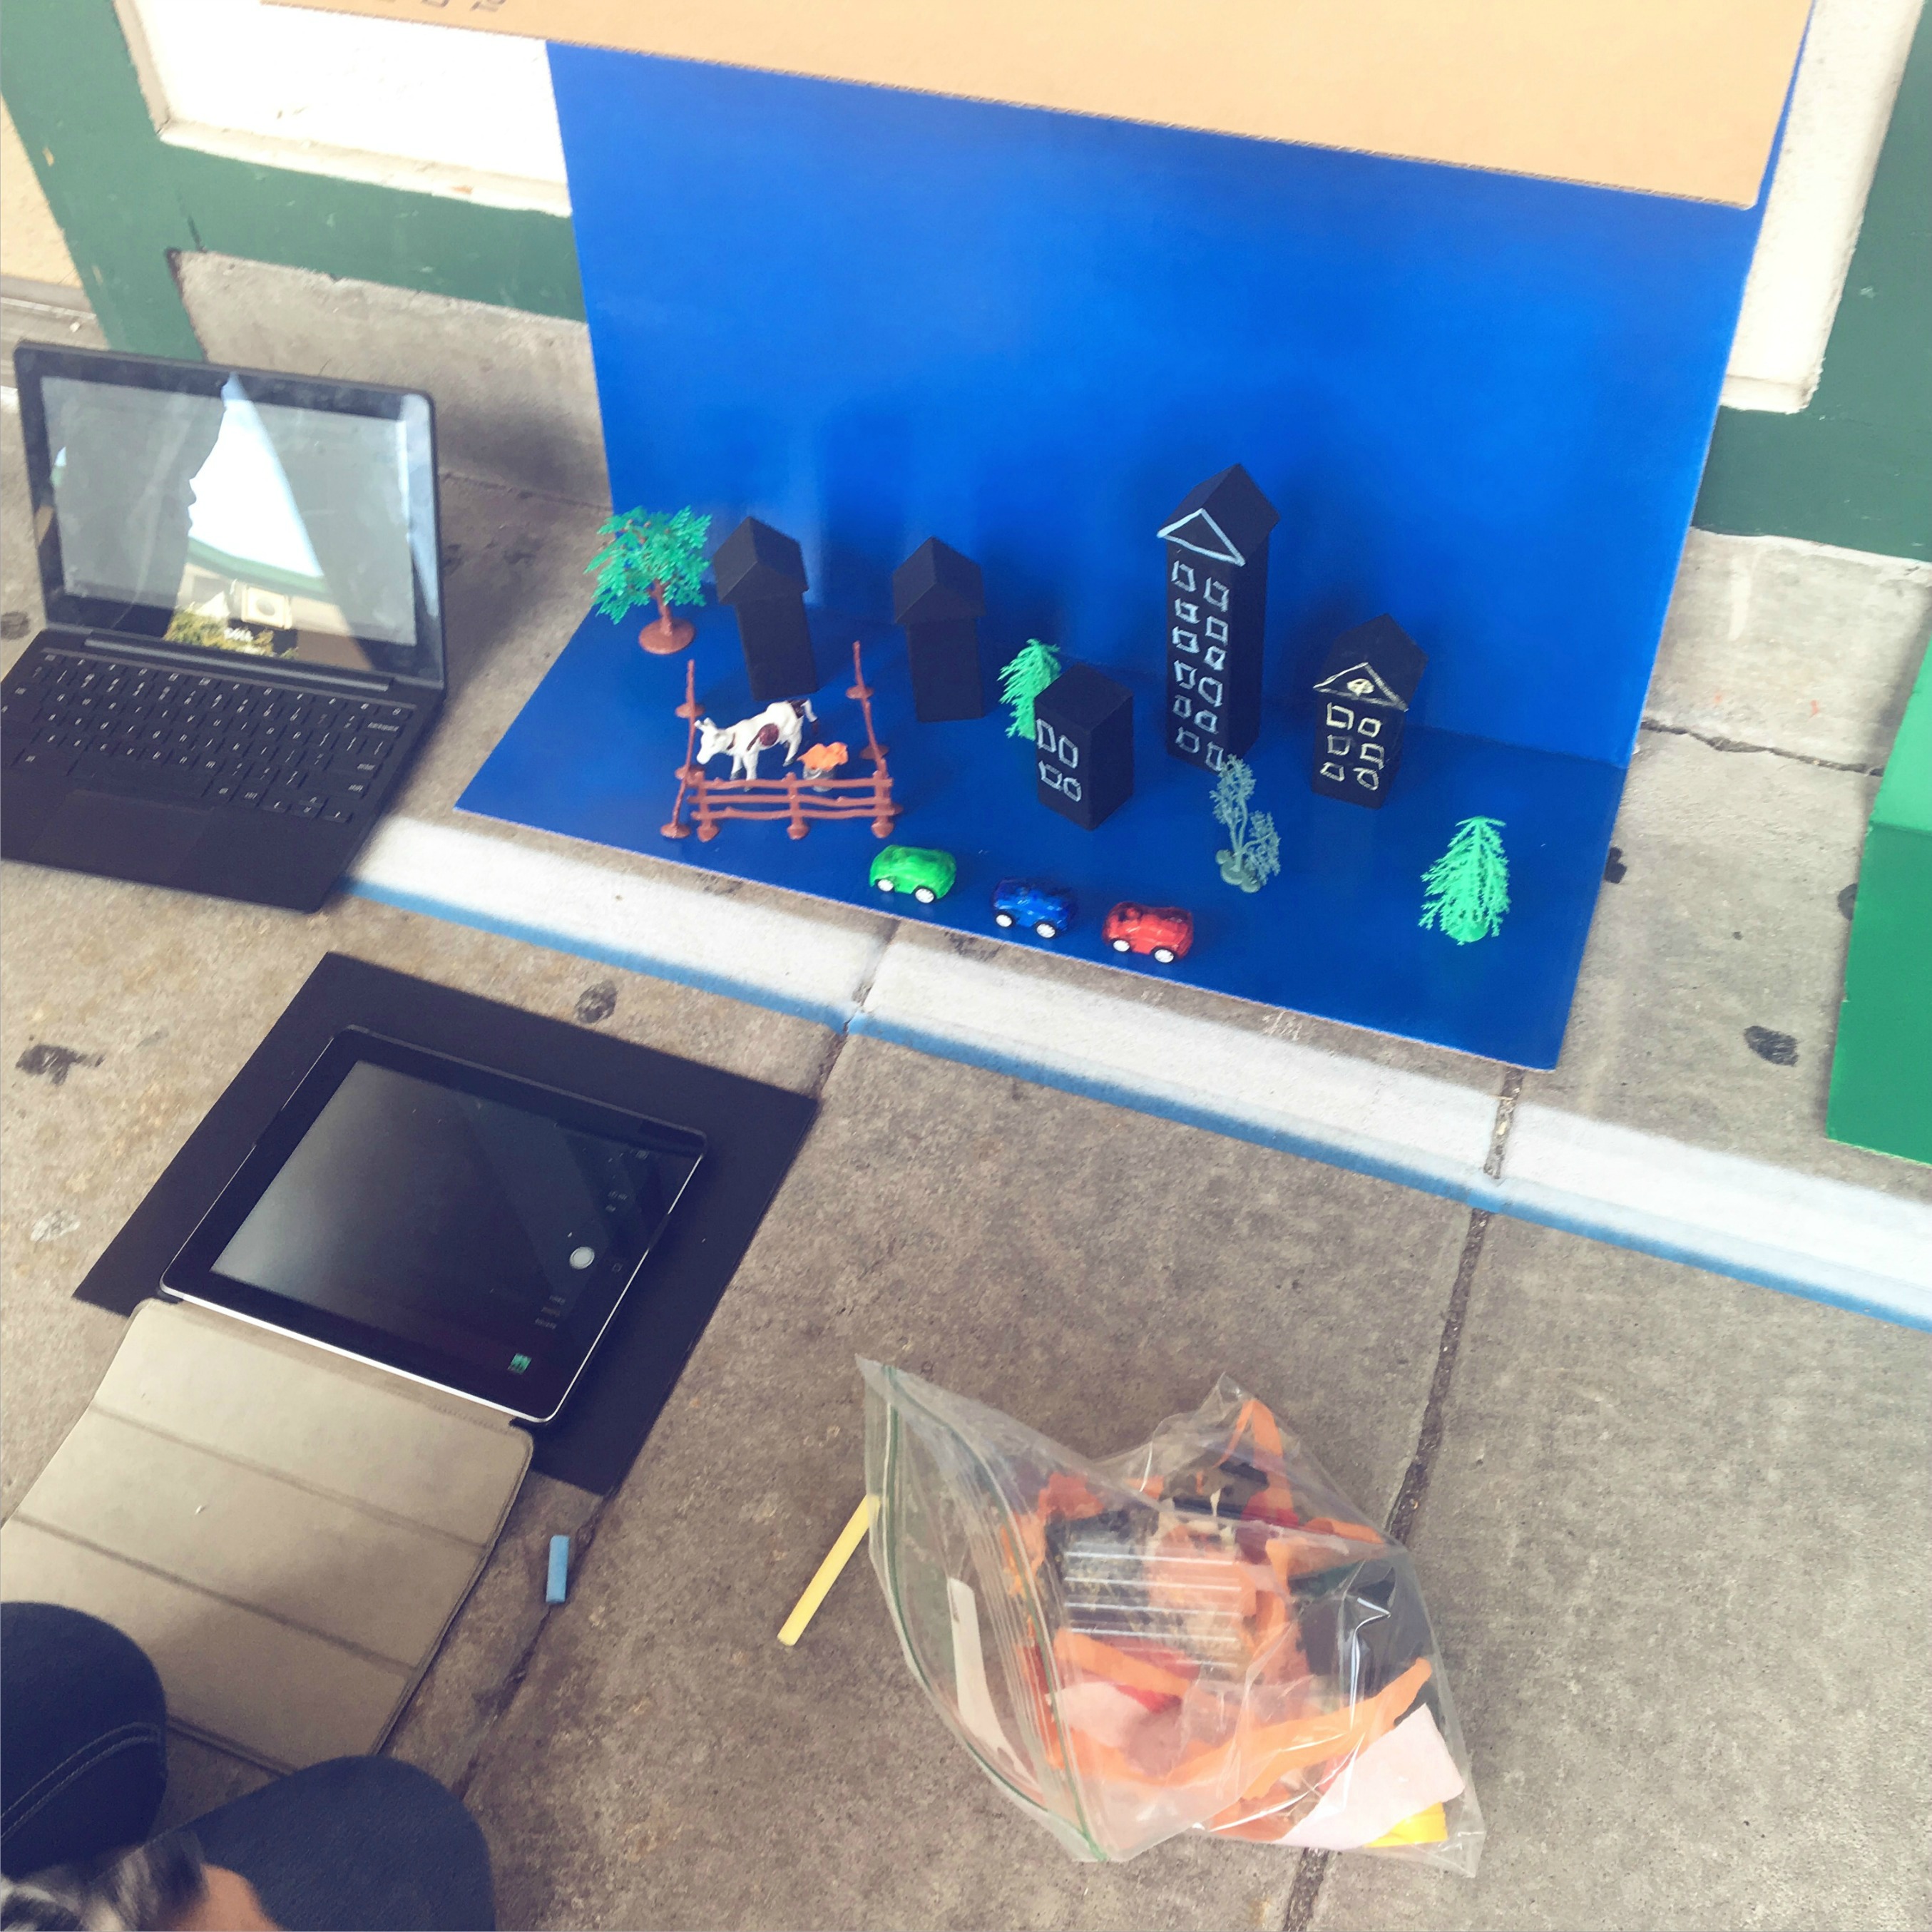
  4. I went to multiple thrift stores over the course of two weeks and purchased as many different types of toys as possible; buying the toys was easy. Sanitizing everything was another story! Students brought in their own Lincoln Logs, Legos, Barbies, and other toys.

GreenScreen6

The Time Frame:

  1. Whewph! From start to finish this took about ten class periods.  I have four ELA classes, and my smallest class has 27 students (my largest had 35 at the time of the project). I encouraged students to work in groups, but I did have four or five students per class period who really wanted to work alone.

Troubleshooting:

I always tell my students, “There’s one of me, and over 30 of you!” We follow the 3B4T rule in class: use your brain, browse the web, ask three buddies, then ask the teacher!

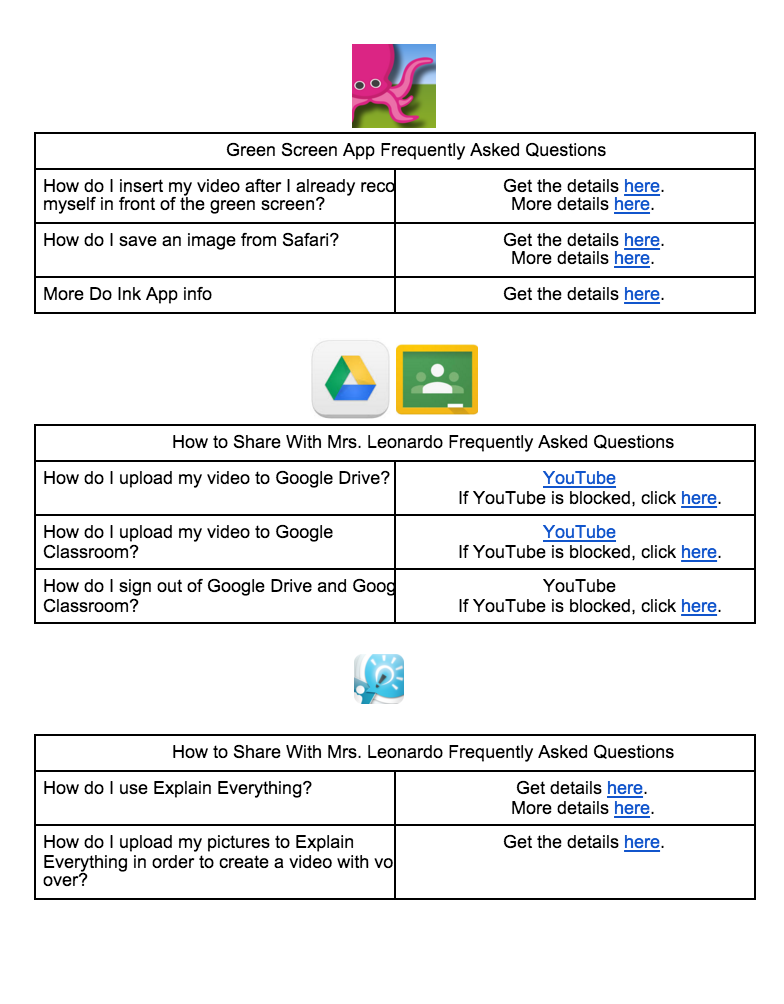
I also created tutorials for FAQs, and created a Hyperdoc with links to YouTube videos for students to watch.

Hyperdoc
Here are a few of videos from the project:

It was a great experience! Now, it’s almost time for round two; stay tuned!

Google Summit and Student Work

Krause Center for Innovation Los Altos Hills Summit 2015

A couple of weeks ago, RCSD‘s staff development department sent out an email to all district teachers about an upcoming optional professional development day at Krause Center for InnovationRedwood City Education Foundation was going to make it possible for at least 10 teachers to attend the mini Google Summit event; I went to the larger Google Summit event at Gunn High School in Palo Alto two years ago, so I knew I had to make sure to be at the KCI event. The catch? Teachers had to apply for a chance to go.

As soon as I got home from our staff meeting, I typed up my answers, submitted them, and waited. A few days later I got an email and it said, “CONGRATULATIONS! YOU GET TO GO TO GOOGLE SUMMIT!” Woohoo! I enjoy learning about new ways to enhance my teaching, so I was excited to learn about new computer applications, ways to better my workflow (and my students’ workflow), and how to enhance student learning through my current blended learning model.

Yesterday (Saturday) I spent the entire day at Krause Center for Innovation learning about ways to use Google Apps for Education in the classroom. In the next few days I plan to implement a few new strategies, and I’ll write about the new sites I learned about, too.

Thank you, Redwood City Education Foundation!

**

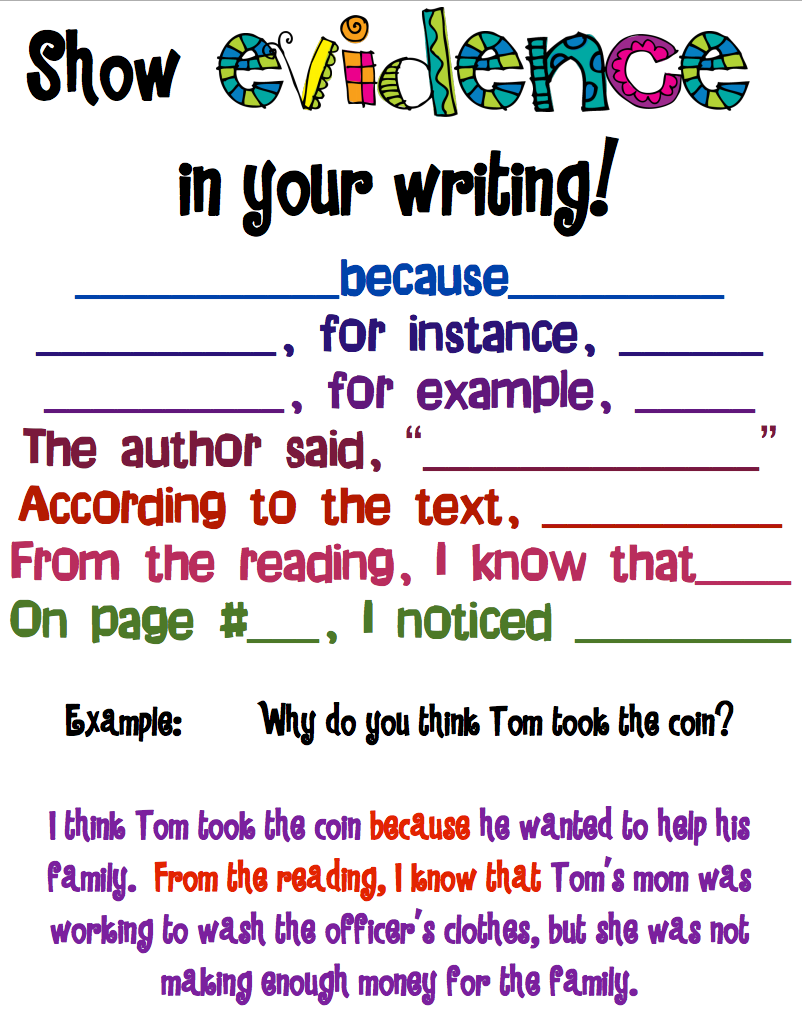
Last week I introduced students to answering text-dependent questions using evidence from the text. This seemed to be a difficult task for many students because they wanted to write their answers using their opinions and thoughts.

I had an evidenced based poster I created last year, but when I went to look for it on my computer, I couldn’t find it! I ended up finding this poster on Teachers Pay Teachers, and while it isn’t the best way for students to write with evidence, it helped many students last week.

Show Evidence in Your Writing

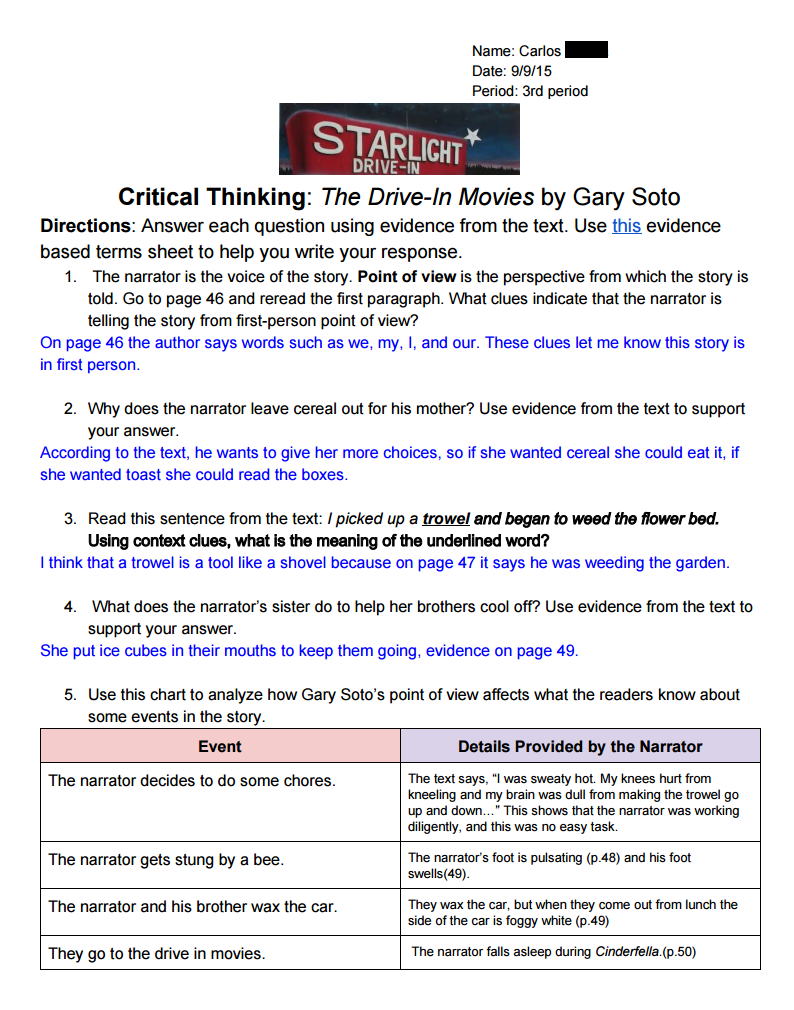
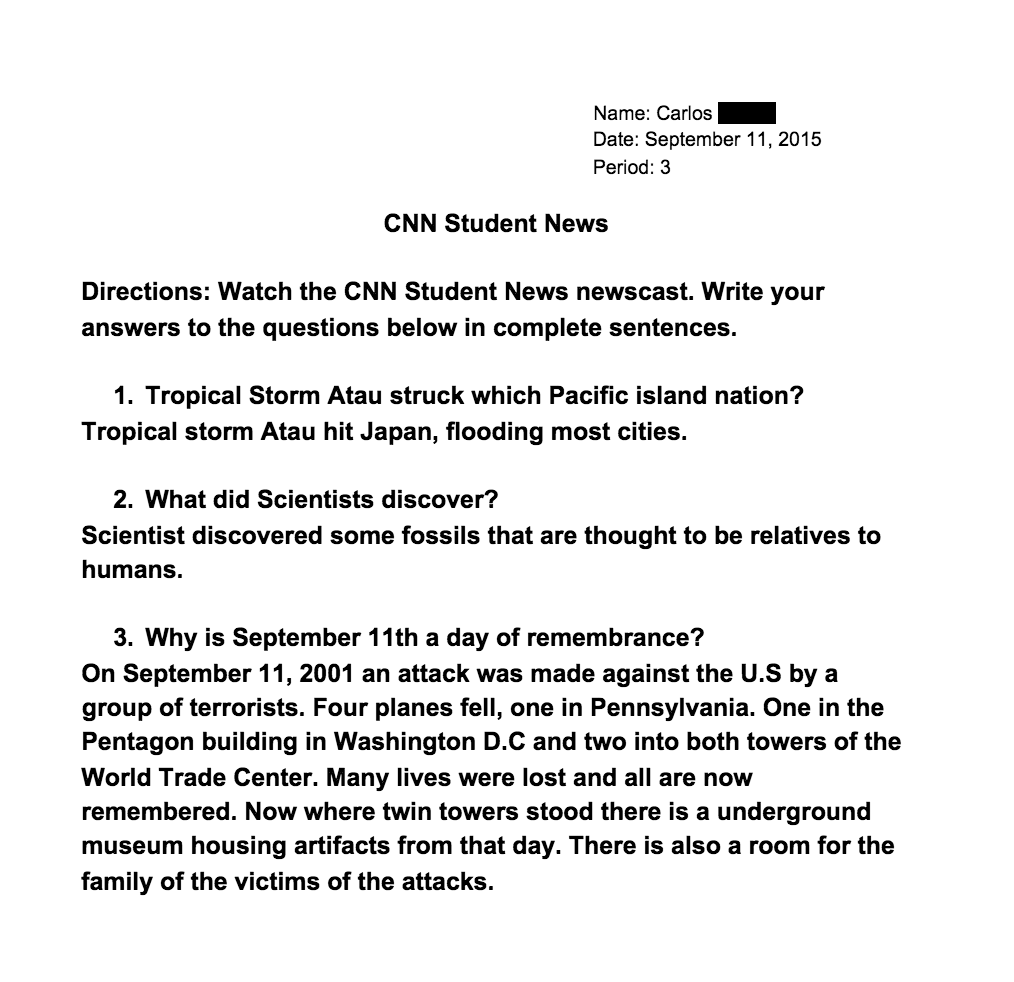
This week I am sharing Carlos’s work. Carlos did a great job using evidence to answer text-dependent questions. On Friday students watched CNN Student News and typed answers to three questions answered in the newscast. Carlos did a great job answering question number three.

Carlos, thank you for your effort!

Critical Thinking The Drive-In Movies by Gary Soto

CNN Student News

6th Graders Analyze “If” by Rudyard Kipling

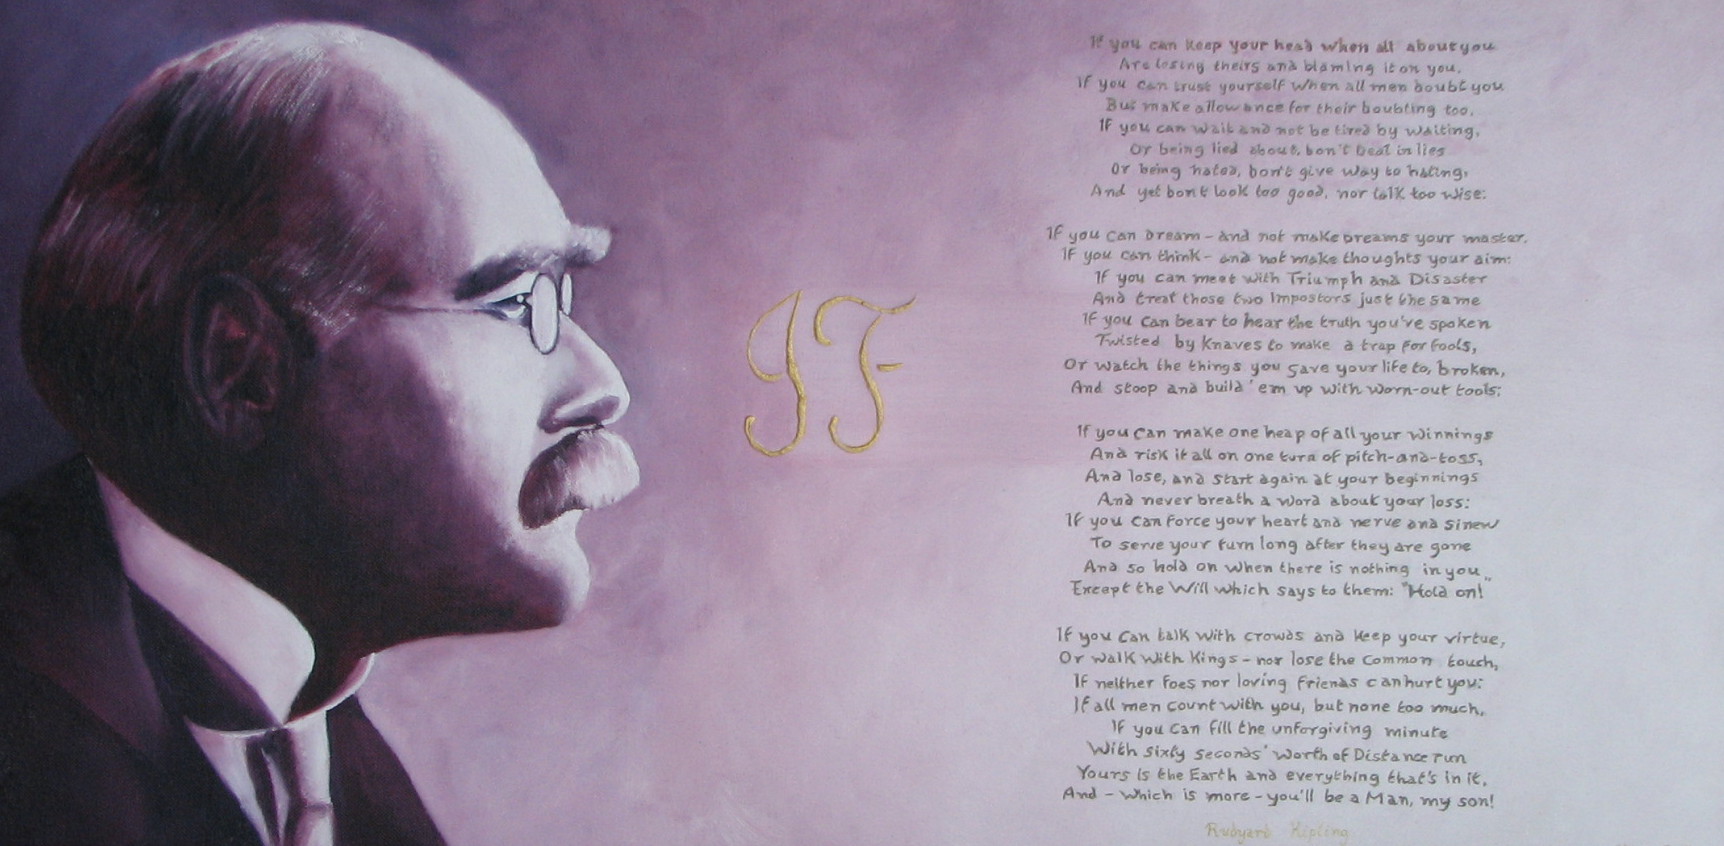
if-stephenguyatt

Image Source

We finally wrapped up Bud, Not Buddy by Christopher Paul Curtis! I’ve heard positive reviews from students, and I’m glad they liked the book. With Common Core State Standards, there’s a big push for students to be able to analyze literary and non-fiction texts. When we read The Lightning Thief, students read an excerpt from Joseph Campbell’s The Hero’s Journey, and ended up writing an analysis explaining how Percy Jackson followed the archetype of a hero. With Bud, Not Buddywe read Steve Jobs’s 2009 Stanford University commencement speech, and compared fictional character Bud Caldwell to Steve Jobs. Students were also required to closely read President Barack Obama’s 2009 back to school speech, answer text-dependent questions, and compare the text with Bud, Not Buddy and the life of Steve Jobs.

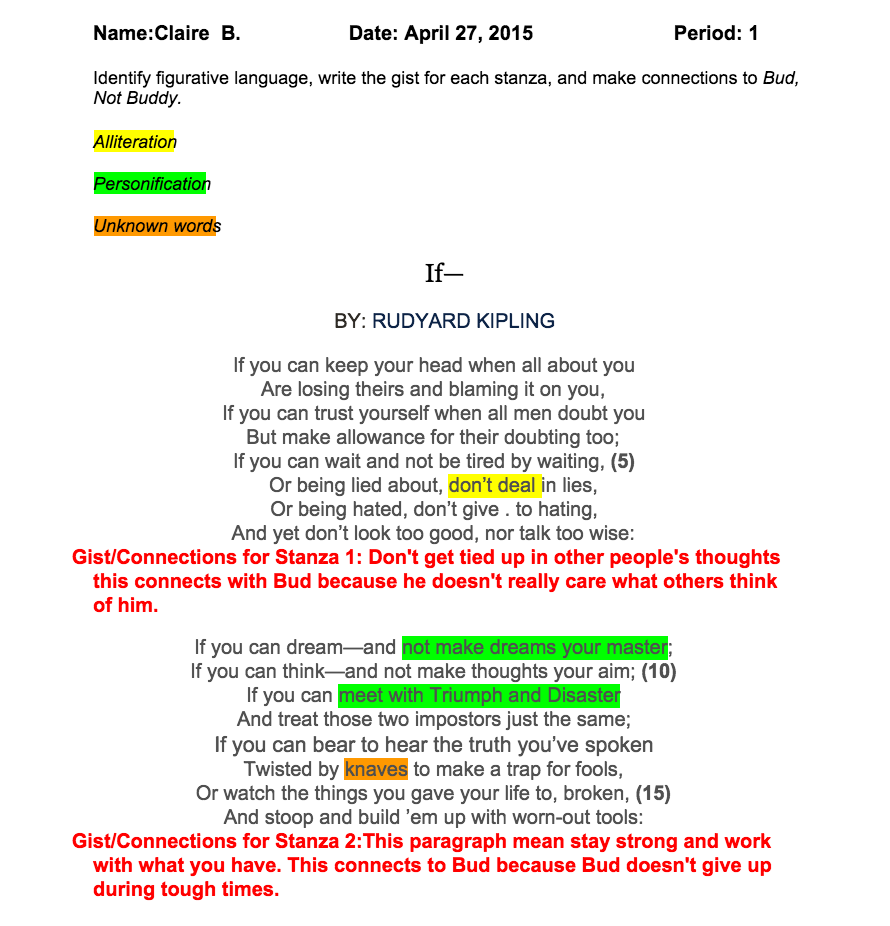
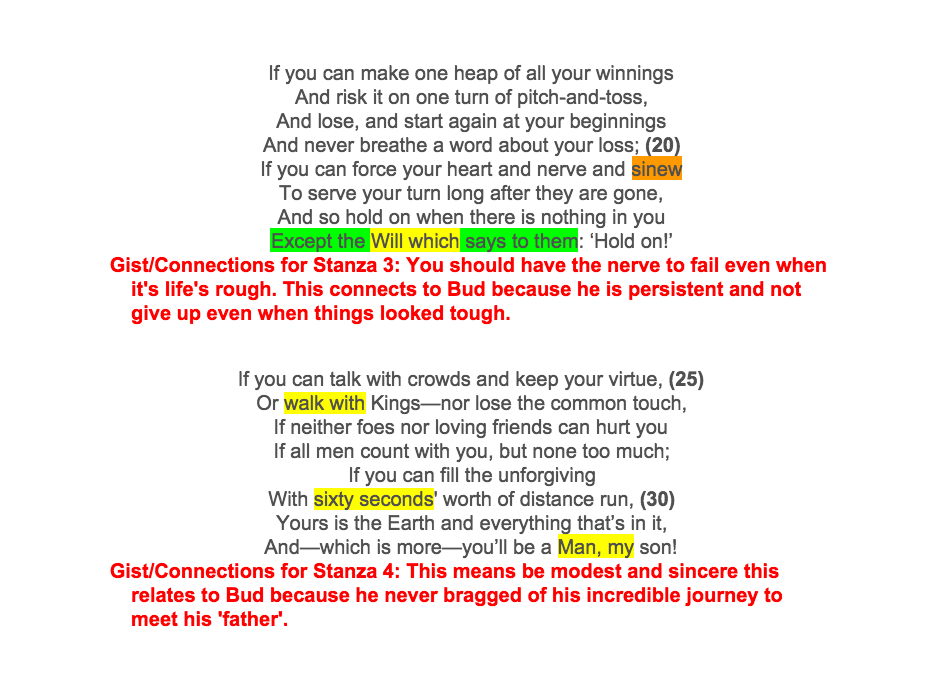
Now that we’ve finished our novel, the last part of our unit included reading Rudyard Kipling’s classic poem “If”; while reading the poem, students were asked to identify personification and alliteration, use context clues to define unknown words, and answer four questions about the poem. The last and final element will be for students to list themes found in Bud, Not Buddy and If, and write an analysis comparing the novel and the poem.

I read the poem aloud first, and then we watched two YouTube videos (video A and video B) featuring the poems. I stopped the videos multiple times to ask questions, have students discuss, and make annotations to the text.

Instead of paper, we used iPads this week. I’m a Chromebook kind of girl, but because the laptops were being used for state testing, I couldn’t get my hands on them. Listed below is a student’s work:

Screen Shot 2015-05-01 at 6.32.30 PM


Screen Shot 2015-05-01 at 6.32.44 PM

Screen Shot 2015-05-01 at 6.25.23 PM After students finished this assignment, they used the Explain Everything App on iPad to create screencast presentations. The presentations allowed the students to verbally state their reasoning for their answers. Check out a few gems!

Great things: 

  • Students were able to get creative with their presentations.
  • NO PAPER 🙂
  • Students helped one another with projects.

Next time:

  • Allow more time for screencasts. We only had two periods to complete the screencasts, and many students wanted more time.
  • Have students type their answers to the questions first to create a script of some sort.
  • Remind students to verbally refer to the text when answering questions (we do this with writing, but they forgot to use evidence, or refer to the text, when answering questions; many students drew circles around the area of text they were discussing, and I thought that was acceptable).
  • Remind students to state just their first name when recording their screencast (because…you know…COPPA!)

Mrs. Leonardo’s DonorsChoose.Org Project

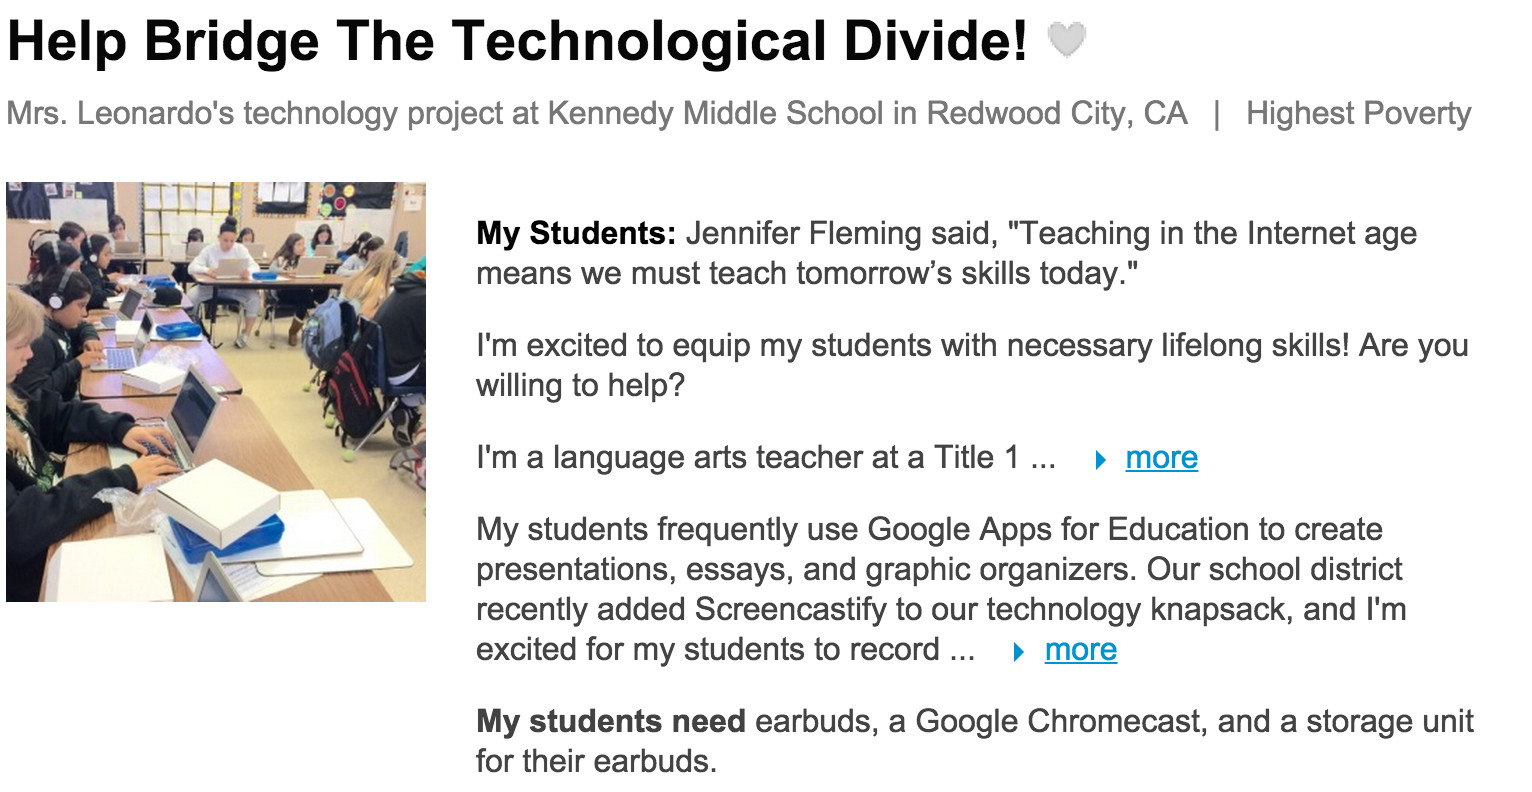
Screen Shot 2015-02-01 at 5.53.19 PM


I want to make sure my students have the materials they need to succeed, so I just created a request for my classroom at DonorsChoose.org:

Help Bridge The Technological Divide!

Give to my classroom by February 8, 2015 and your donation will be doubled thanks to DonorsChoose.org. Just enter the code SPARK on the payment page and you’ll be matched dollar for dollar (up to $100).

If you know anyone who may want to help my classroom, please pass this along!


6th Graders Participate in Hour of Code

Screen Shot 2014-12-10 at 6.52.16 PM

All students that attended school today participated in Hour of Code! What a fun, fun day! Read more about Hour of Code here. Many students enjoyed creating interactive games and products using tools on Code.org and Khan Academy.

Image

D. from period one was stoked to create his on video game that he published to the web.

L. from period three created this Flappy Bird game. Play here. Good luck!

H. from period five created her own nifty Flappy Bird game. Batman! So cool!

Image (1)

This was so cool to watch. K was struggling with his code and he had no idea what to do next. His table partner stepped in when I had no idea what to do, and both boys figured out the error in the code, and made their video game work. AWESOME!

FullSizeRender

Finally, K. from period six got the hang of scratch and created her very own holiday card with–SOUND! WOW!

IMG_4356

IMG_4357

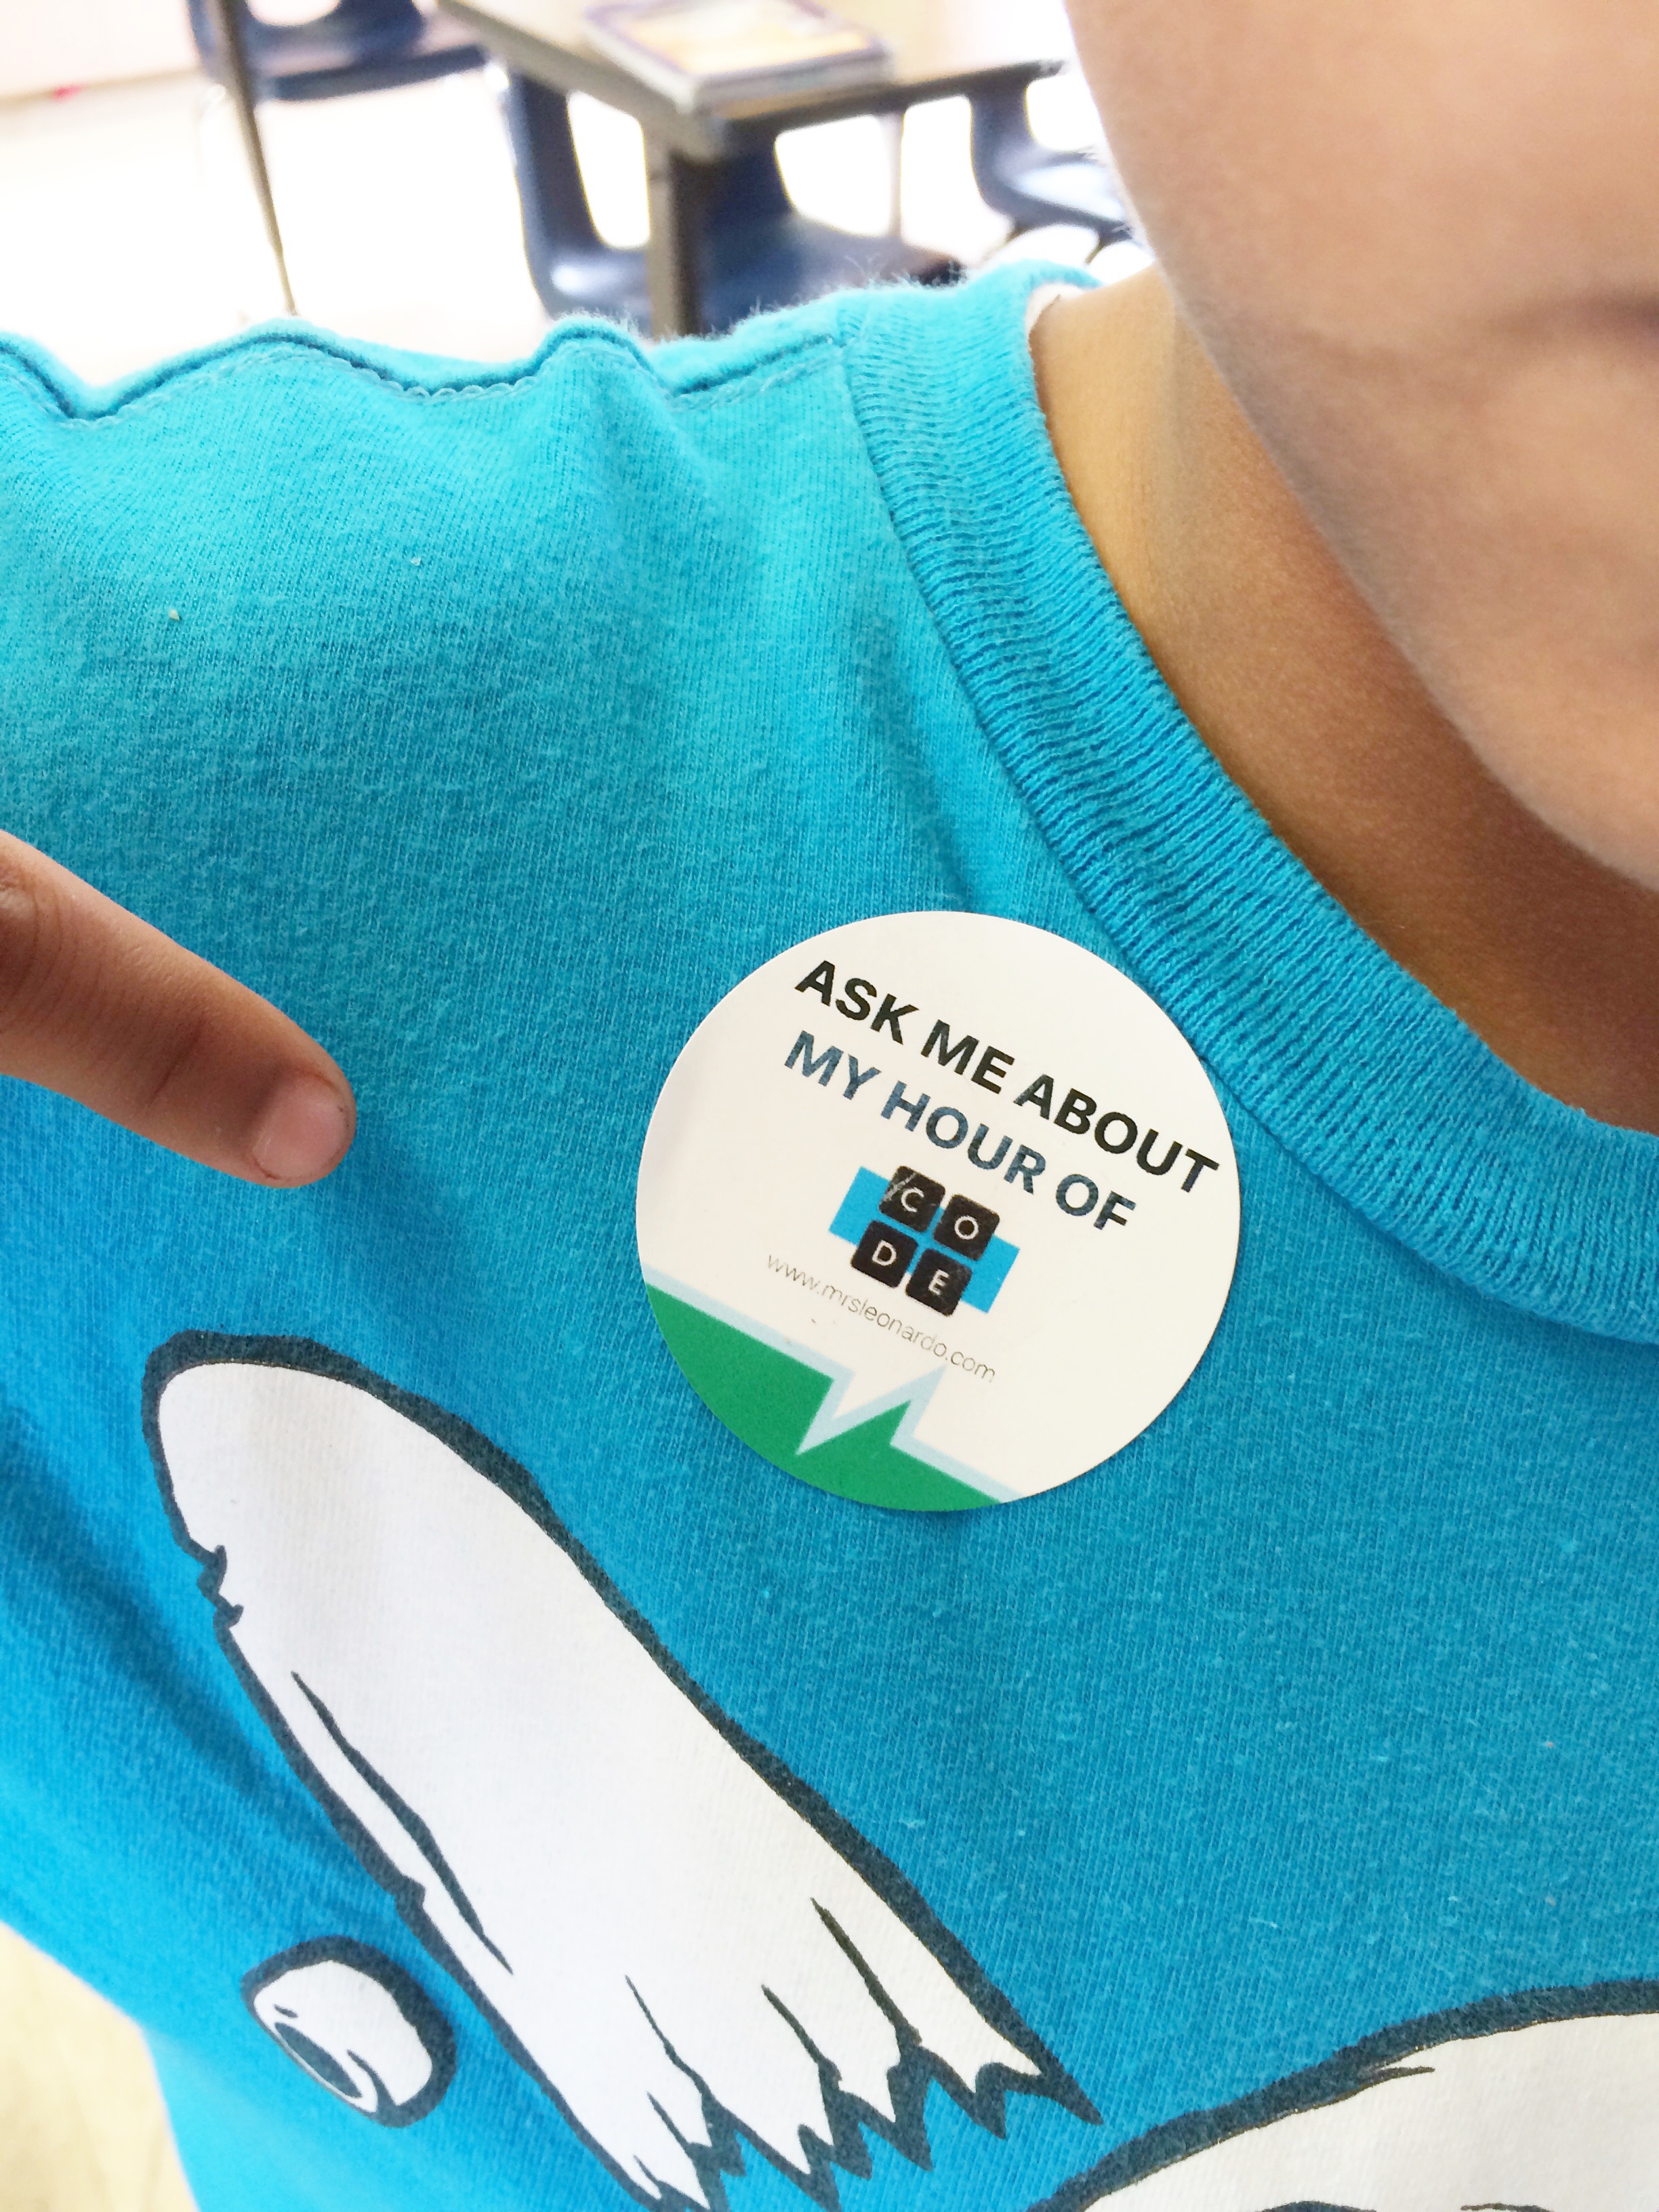
Every student that participated got a certificate to verify their completion of one hour of computer programming.

If you enjoyed your Hour of Code as much as I did, be sure to sign up for Kennedy’s brand new coding club!

We will meet on Tuesdays from 3:15-4:15 in computer lab 530.

In the meantime, keep coding! Oh, and check out the Flappy Bird game I created right here.

Made With Code

Code.org

Khan Academy

Scratch

CodeAcademy

Screen Shot 2014-12-10 at 6.51.15 PM